Posted by on 8/2/2021 to Articles
We program the truck scale intercoms with settings that meets the majority of installations. We added an amplified horn speaker since we were getting returns because some customers weren’t happy with the volume. If the volume was set at maximum on the outdoor intercom there was sometimes clipping of the conversation. We solved that problem by turning down the volume on the outdoor intercom and installing an amplified horn speaker three feet above the outdoor intercom. That gives the volume needed without the clipping since you have greater separation between the microphone and speaker.
Here are the steps you will take when you receive the equipment:
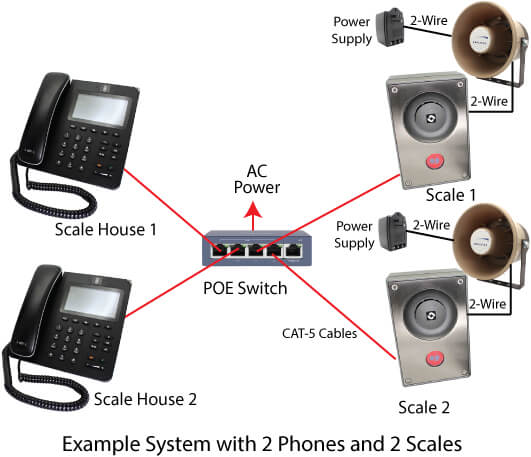
- Plug a POE Ethernet switch into power (you provide the switch or purchase one from us). We recommend bench-testing everything with known working cables before the final install. Each phone comes with a 6 foot CAT-5 cable, but you will need to make one for the outdoor callbox. We do not recommend installing this system on a POE switch that is used for an existing computer network. If you do we cannot support it.
- If you have multiple outdoor intercoms, plug in the one marked Edge Controller or Scale 1 first using a standard CAT-5 or 6 cable with RJ-45 connectors. This is the server that drives everything. Let it boot up for around 60 seconds until the light on the button is solid very dim yellow.
- Plug the phone(s) and any other outdoor intercom(s) into the POE switch. Do NOT use any power supplies that came with the phone(s). They get their power from the POE Switch.
- Wait for the phone and other devices to boot up (about 60 seconds).
- Press the button on the outside intercom and it should make a call to the phone(s).
- The phone(s) have speed-dial buttons programmed to call the other devices. You may have to switch screens to see them depending on the phone.
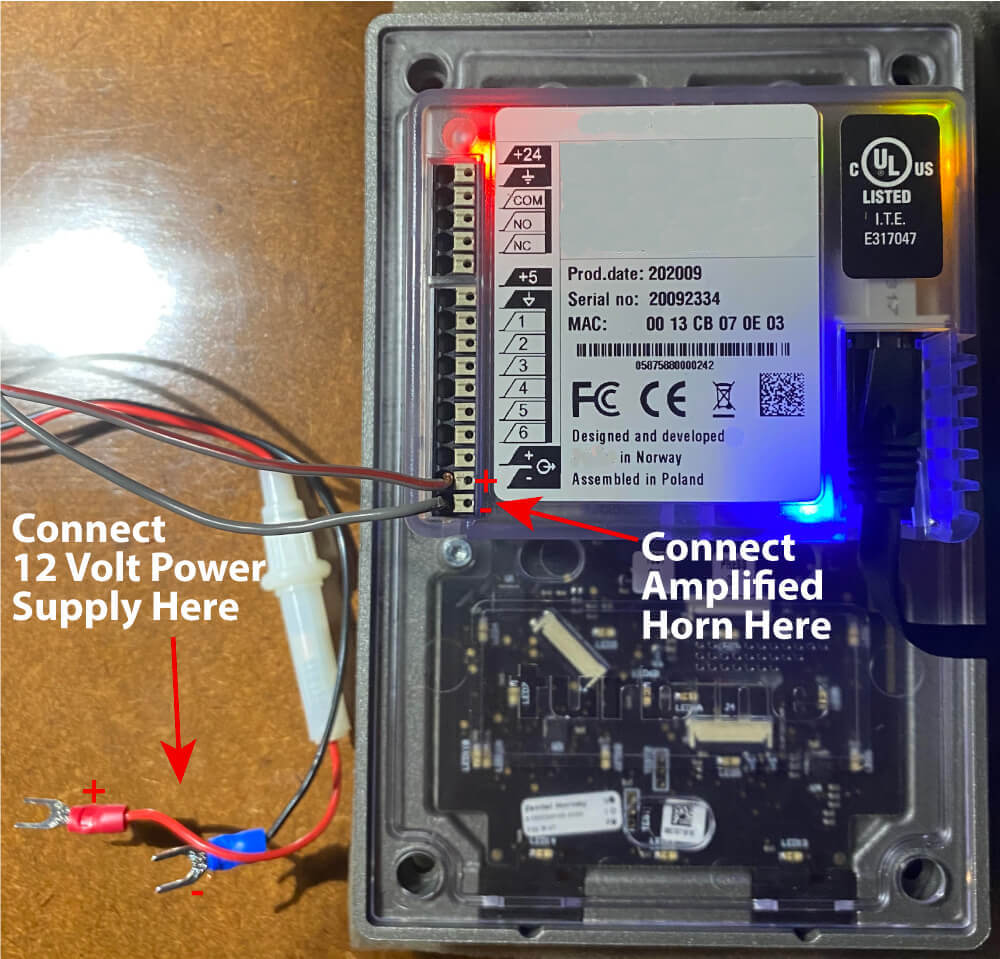
- For the external amplified speaker, see the wiring connections photo below. The horn speaker MUST be mounted at least three feet above the stainless steel callbox or it will interfere with the full-duplex and noise cancelling circuitry.
- Also make sure all of the unused holes in the outdoor intercom housing are sealed with the included plugs. Otherwise water can get in as well as noise, which can affect the noise cancelling circuitry.
Amplified Horn Speaker Connections
- Make sure all holes in the metal housing are sealed. Any sound coming in through the back of the housing will affect the performance of the system.
- Install the horn speaker the full length of the included cable above the intercom and pointed straight out and not down towards the intercom. The microphone is in the intercom and not the speaker. You want as little sound from the speaker entering the microphone as possible. Make sure to observe the polarity of the speaker wires as shown in the picture below.
- The loudspeaker is capable of ear-damaging levels of sound. However, if it is too loud the system will not function properly. You want it just loud enough for the drivers to hear clearly. No need to blow them away.
- The volume of the callbox has been turned down to a low level. This will make it easier for noise cancelling circuitry to function.

Optional Optical Sensor Installation
If you don’t want the driver to have to press the call button when they arrive, then you can connect a photo beam or motion sensor to an input on the outdoor callbox. When this feature is set up properly, it will trigger a call to the inside phone where it can be answered.
Hardware Connection
Connect your motion or photo beam sensor to the Ground and Pin 1 as shown in diagram below. You will be using I/O 1 for your photo or motion sensor.
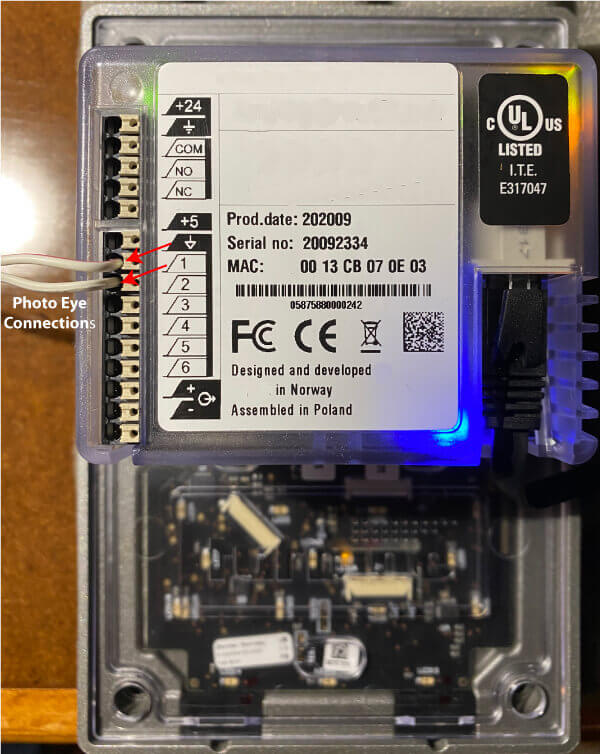
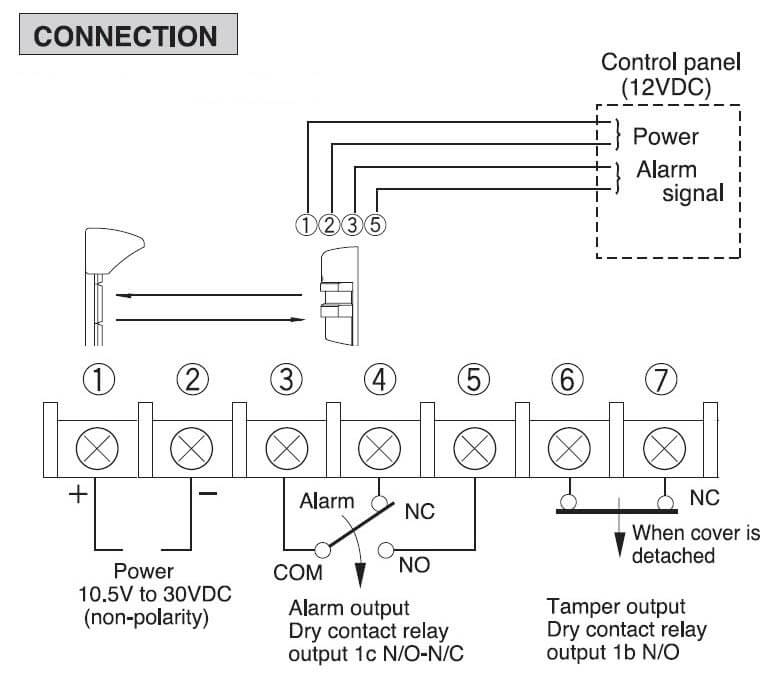
The wires on the intercom Input port go to the optical sensor pins 3 and 5 Normally Open contacts shown in the following diagram for the TAKEX PR-11BE sensor.
Programming Changes
If you desire to make any programming changes, you will be required to plug in a PC to the POE switch and set your Ethernet adapter on the PC so it can access the system. Follow the instructions below to do this.
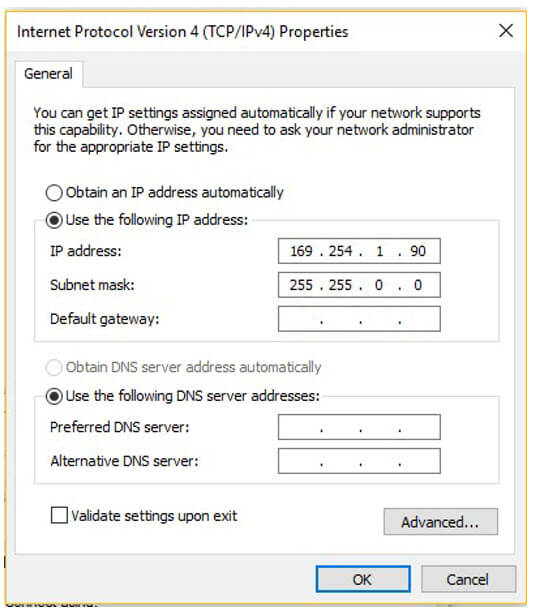
To access the web interface of the truck scale 1 server, your computer must be in the same subnet range as the it. Follow this procedure on a Windows PC:
- Click Start, and type Control in the search field, then select Control Panel.
- Click on Network and Internet.
- Click on Network and Sharing Center.
- On the left pane, click the Change adapter settings link.
- Right-click on your computer’s Ethernet network adapter and select Properties.
- Select the Internet Protocol Version 4 (TCP/IPv4) option.
- Click the Properties button.
- Select the Use the following IP address option.
- Set the IP address (e.g., 169.254.1.90).
- Set the Subnet mask. (e.g., 255.255.0.0).
- Click OK.
- Click Close again to close the network adapter properties
- You will now be able to enter the IP address of 169.254.1.100 to access the built in administration software.